How to Use the Ceiling Speaker Calculator: A Step by Step Guide
A field by field walkthrough of the ceiling speaker calculator: what to prepare first, how to fill in every input, and how to read each result number.
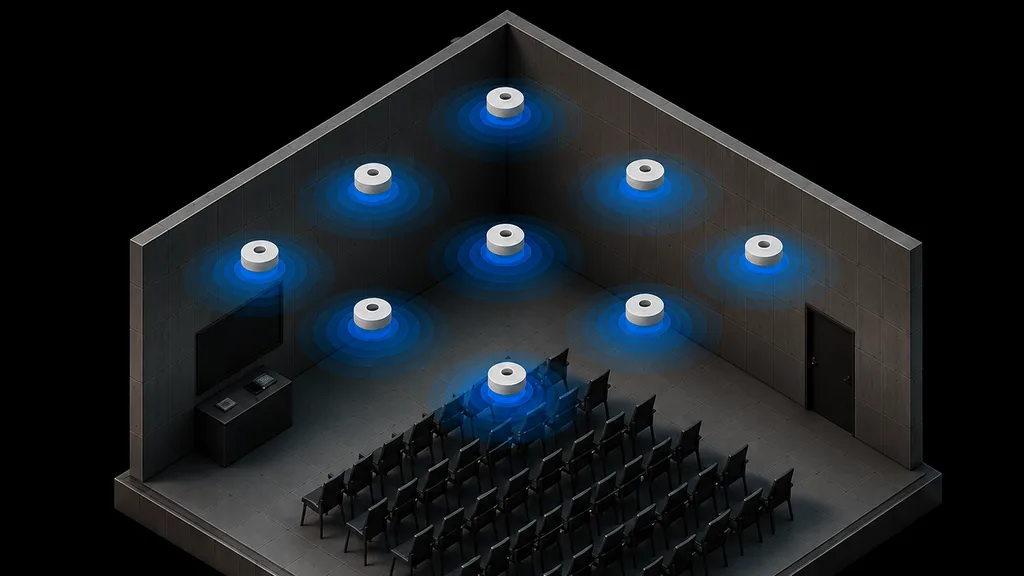
Table of Contents
The ceiling speaker calculator works out how many ceiling speakers a room needs, where they sit on the ceiling, and what transformer tap to specify for each one. It starts from the geometry of a dispersion cone and ends with a speaker schedule you can price.
This guide lists every field the ceiling speaker calculator asks for, what to enter, and what each output number means, in the order the interface presents them. Open the ceiling speaker calculator in a second tab and follow along as you read.
Two inputs carry most of the outcome: the dispersion angle you choose, which sets how wide each coverage circle is, and the overlap profile, which decides how tightly those circles are packed.
The formula
The layout comes from a cone meeting the listening plane. The tap comes from a level budget over that same distance.
Overlap factor is 0.50 at maximum overlap, 0.866 at minimum overlap, 1.00 edge to edge and 1.45 stretched. The 0.866 is the hexagonal spacing at which circles meet without leaving a gap, which is why that profile and a hex grid belong together. P_required is then rounded up to the next standard tap between 0.5 W and 64 W.
- H_ceiling, H_ear - ceiling height and listening ear height.
- h_eff - the throw, which is the difference between those two and not the ceiling height itself.
- θ - published dispersion angle, taken at the highest frequency the content needs.
- R, D - coverage radius and diameter where the cone meets the listening plane.
- S - spacing between speakers.
- L_ambient, SNR - ambient noise level of the space type, and the signal to noise target added on top of it.
- Sens - speaker sensitivity, in dB at 1 W and 1 m.
Before you start
- Room width, length and ceiling height, in metres or feet, from a reflected ceiling plan. The calculator lays speakers out on a rectangle, so use the rectangular extent of the area actually being covered.
- The listening plane, meaning whether the room is used seated or standing, since that sets how far the sound has to travel and therefore how wide each circle is at the ear.
- A candidate speaker, with two numbers off its datasheet: the dispersion angle and the sensitivity in dB at 1 W and 1 m.
- The frequency your content actually needs, because dispersion narrows as frequency rises and the datasheet usually quotes several angles.
- A view on coverage quality, which becomes the overlap profile. Speech intelligibility and background music have genuinely different requirements here.
- The ceiling module, if the speakers must land on a tile grid rather than at ideal spacing.
- A space type, which sets the ambient noise assumption and with it every level target in the result.
Input fields
Every control the ceiling speaker calculator asks for, grouped by the panel it sits in, and listed in the order you meet it on screen.
Getting started
Load example – Fills the fields with an 18 by 12 by 3.2 m room, a seated listening plane at 1.2 m ear height, a 100 degree speaker at 89 dB sensitivity, minimum overlap on a hex staggered grid, and Quiet office, classroom as the space type. It populates the inputs only. You still press Generate result to get an answer.
m / ft toggle – Sets the working unit for every dimension on screen. Switching it after you have entered values converts them, so there is nothing to redo by hand.
EN / ID toggle – Switches the whole interface between English and Indonesian. On the ALTA Integra site it follows the page language automatically.
Room
Width, Length, Ceiling – The rectangular extent of the area to be covered and the height of the ceiling the speakers mount into. Ceiling height matters because the calculator works from the vertical distance down to the ears, not from the ceiling itself.
Listening plane
Seated, Standing, Custom – Seated sets ear height to 1.2 m, Standing sets it to 1.7 m, and Custom lets you type your own. The field is locked while Seated or Standing is selected.
Ear height – The height of a listener’s ears above the floor. The tool subtracts this from the ceiling height to get the throw distance, so a higher ear height means a shorter throw, a smaller coverage circle and more speakers.
The tool gives one piece of advice here directly: in rooms used both seated and standing, calculate at standing height, so the smaller coverage circle is the one that governs the layout.
Speaker
Dispersion (°) – The included coverage angle of the speaker. This is the single most influential number in the calculation: coverage radius is the throw distance multiplied by the tangent of half this angle, so a narrower speaker shrinks every circle and multiplies the count.
Sensitivity (dB 1W/1m) – The speaker’s output at one watt measured at one metre, from the datasheet. It does not change how many speakers you need, only how much power each one has to be given.
The tool notes that you should use the dispersion angle at the highest frequency your content needs. Paging at roughly 2 to 3 kHz is the widest case; music at roughly 10 to 12 kHz is the narrowest and needs more speakers.
Spacing and grid
Overlap profile – Five choices, each a multiplier applied to the coverage diameter to get the target spacing. Maximum overlap at 0.50 times D gives high SPL and minimal variance. Minimum overlap at 0.866 times D is gap-free on a hex grid. Edge-to-edge at 1.00 times D has cones just touching, with small diagonal gaps. Stretched at 1.45 times D suits background music and paging. Forced grid snaps spacing to a ceiling module instead.
Ceiling module – Only asked for under Forced grid. The spacing is snapped to a whole number of tiles so the speakers land on the module rather than between it.
Square grid or Hex staggered – Square places speakers in aligned rows and columns. Hex staggers alternate rows, which packs circles more efficiently and is what makes minimum overlap gap-free.
Level targets
Space type – Five presets, each setting an ambient noise level and a signal to noise target: Library or residence at 40 dB, Quiet office or classroom at 50 dB, Restaurant or retail at 60 dB, Noisy office or gym at 70 dB, and Busy cafeteria or atrium at 80 dB.
Ambient, Desired S/N, Max target – All three fill in automatically from the space type and are shown for reference. Signal to noise follows the +10 to +15 dB intelligibility range, and max target sits 12 dB above the minimum needed level with a 90 dB SPL floor.
What to fill in
A checklist tracks the ten required items and shows a running count: room width, room length, ceiling height, listening plane, ear height below ceiling, dispersion angle, speaker sensitivity, overlap profile, grid geometry and space type. An eleventh, ceiling module, appears only under Forced grid. Ear height must sit below the ceiling for the checklist to clear, and Generate result stays disabled until it does.
Reading your result
Speakers required – The headline count, with the grid it implies beside it, expressed either as a number per row across a number of staggered rows for hex, or as columns by rows for square.
Verdict – A one line judgement on the layout, and the most useful thing on the panel. Coverage complete means every point between the speakers falls inside a circle at the listening plane. Cones touch on axis means the circles meet along rows and columns but small diamond areas between four speakers fall outside, which is expected for that profile. Gaps in coverage means the pitch genuinely exceeds the coverage diameter and there are uncovered pockets. Layout impractical, Power short and Above max target each name a specific problem with the inputs rather than the room.
Coverage radius and Coverage diameter – The circle one speaker covers at the listening plane, derived from the throw distance and half the dispersion angle.
Target spacing – The ideal centre to centre distance, which is the coverage diameter multiplied by the overlap profile factor.
Actual column pitch and Actual row pitch – What the spacing becomes once a whole number of speakers has been fitted into the room. These are the numbers to dimension on the reflected ceiling plan, not the target spacing. Where only one speaker fits in a direction the field reads single column or single row instead.
First speaker from walls (x / y) – The setting out offset from the walls to the first speaker centre, which is what lets someone mark the ceiling from the drawing.
Throw to ear plane – Ceiling height minus ear height, the distance the calculation actually works from.
Worst point between speakers – The distance from the nearest speaker centre to the least well covered point in the pattern. Compared against the coverage radius, this is what the verdict is based on.
Power per speaker and transformer tap – The power each speaker needs and the nearest standard 100 V line tap that supplies it, chosen from 0.5, 1, 2, 4, 8, 16, 32 and 64 W.
Minimum needed level, Achieved at ear, one speaker, Distance loss and Headroom to max target – The level the space requires, what a single speaker delivers at the ear, the loss over the throw distance, and how much room is left below the maximum target.
The panel carries an important qualifier on those level figures: overlapping speakers add roughly 3 dB per doubling of contributors, so a tightly spaced layout sits above the single-speaker number shown. The levels assume free field, with no reflections and no reverberation.
Plan and Elevation drawings – A plan showing coverage circles, speaker positions and the room outline at ear height, and a side elevation showing the dispersion cone from ceiling to listening plane. Both appear once the checklist is complete and a result has been generated.
Common mistakes
These are the errors that most often make the calculator return a plausible but wrong number.
Using the widest dispersion angle on the datasheet. Manufacturers quote dispersion at several frequencies and the widest figure is usually the lowest frequency. Coverage has to hold at the highest frequency your content needs, so a music system entered at its 2 kHz angle will be badly under-populated.
Calculating a mixed-use room at seated height. Standing ears are closer to the ceiling, which shortens the throw and shrinks every circle. The tool says this directly: calculate at standing height so the smaller circle governs.
Reading target spacing as the dimension to build. Target spacing is the ideal. Actual column pitch and actual row pitch are what the layout resolves to once whole speakers are fitted into the real room, and those are the numbers that belong on the drawing.
Choosing an overlap profile by cost alone. Stretched at 1.45 times D is the cheapest and is genuinely correct for background music and paging. Used for speech intelligibility it leaves real gaps, which the verdict will say plainly.
Taking the single-speaker level as the level in the room. Achieved at ear, one speaker is exactly that. In an overlapping layout the sum is higher, roughly 3 dB per doubling of contributors, which is why headroom to max target deserves a look before the tap is fixed.
Picking a space type from the room name. The ambient noise figure is what drives every level target. An open plan office next to a busy atrium behaves like the noisier preset regardless of what the drawing calls it.
When the ceiling speaker calculator is not enough
The tool describes itself accurately as rule-of-thumb estimation for system designers, estimators and contractors.
The geometry is free field. It models a cone from each speaker down to a flat listening plane, with no reflections, no reverberation and no absorption. That is a reasonable approximation in a carpeted office with an acoustic tile ceiling. It is a poor one in a hard-surfaced atrium or a sports hall, where reverberation, not coverage, is what limits intelligibility, and where a layout that passes here can still be unusable.
It also assumes one rectangle, one ceiling height and one uniform speaker. Sloped ceilings, mezzanines, structural interruptions, mixed speaker types and zoned paging all sit outside it. And because it works to a coverage criterion rather than a speech transmission index, it cannot answer the question a specification usually asks, which is whether announcements will be intelligible.
For counting speakers, setting them out and sizing taps early, it is fast and dependable. Once a design carries real weight, 3D SPL mapping, direct-to-reverberant ratio and STI modelling in dedicated acoustic software using manufacturer polar data is the next step, and ALTA Integra takes it from there.
FAQ
How many ceiling speakers do I need for my room?
That depends on ceiling height, ear height, dispersion angle and how much overlap you want. Enter those into the ceiling speaker calculator and it returns the count directly, along with the grid, the spacing and the setting out offsets. As a rule the count rises sharply as ceilings get lower or dispersion gets narrower, because both shrink the circle each speaker covers.
Which overlap profile should I choose in the ceiling speaker calculator?
For speech intelligibility use minimum overlap at 0.866 times D on a hex grid, which is gap-free. For background music and paging, stretched at 1.45 times D is usually adequate and much cheaper. Maximum overlap at 0.50 times D gives the tightest seat to seat consistency at the highest cost, and edge-to-edge sits between them with small diagonal gaps.
What dispersion angle should I enter?
Use the angle your speaker holds at the highest frequency your content actually needs, not the widest figure on the datasheet. Paging content at roughly 2 to 3 kHz allows the widest angle. Music at roughly 10 to 12 kHz is the narrowest case and will require more speakers for the same room.
Why does Generate result stay disabled in the ceiling speaker calculator?
Ten items must be filled in first: room width, room length, ceiling height, listening plane, ear height, dispersion angle, sensitivity, overlap profile, grid geometry and space type. The checklist shows a running count of how many are done. Ear height must also sit below the ceiling height, which is the condition most often missed.
Should I use a square grid or a hex staggered grid?
Hex staggers alternate rows so circles pack more efficiently, and it is what makes minimum overlap gap-free. Square is easier to set out and to coordinate with a tile grid and services. If coverage quality is the priority choose hex; if buildability and coordination matter more, square with a tighter overlap profile achieves a similar result.
Does the ceiling speaker calculator account for room acoustics?
No. It assumes free field, with no reflections and no reverberation, and it says so on the results panel. In a reverberant space such as an atrium or a sports hall, reverberation rather than coverage is usually what limits intelligibility, so a layout that passes here still needs to be checked against the room’s acoustic behaviour.