How to Use the Room Mode Calculator: A Step-by-Step Guide
A field by field walkthrough of ALTA Integra's room mode calculator, covering every input, the load example preset, and how to read the modal spectrum and pressure map before you trust the result.
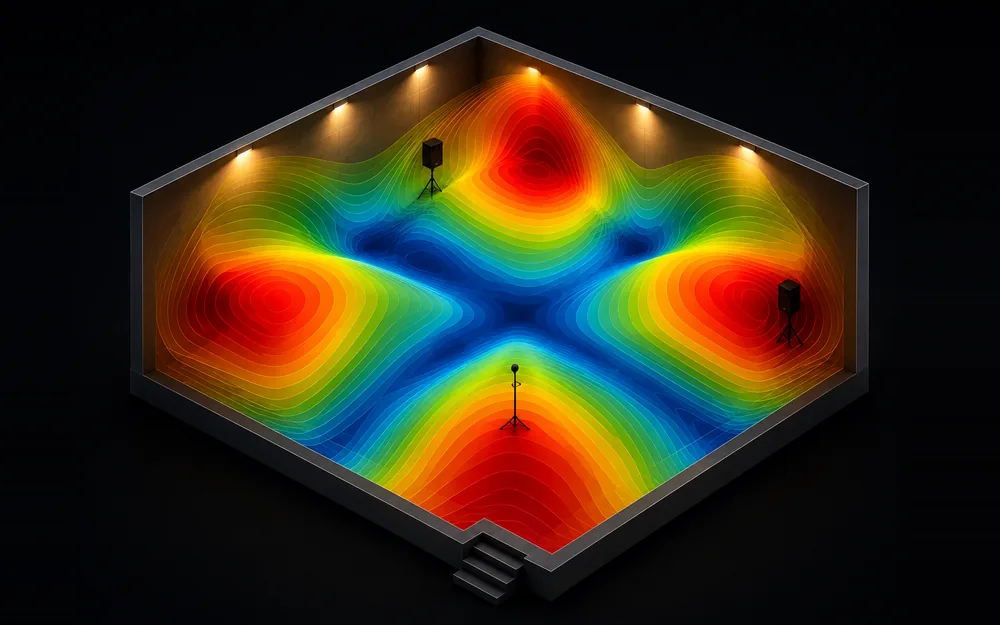
Table of Contents
The room mode calculator predicts which frequencies a rectangular room will resonate at on its own, and how evenly those resonances spread through the low end. Enter the internal length, width and height and the room mode calculator lists each mode inside the analysis window and classifies it as axial, tangential or oblique.
This guide covers the interface: which field to fill first, what each control does, and how to read the spectrum and pressure map once a result appears. The physics and a worked example already live on the room mode calculator's own page, so this guide does not repeat them.
The formula
Every mode frequency the calculator lists comes from one equation, evaluated over a grid of whole-number combinations.
The calculator walks p, q and r from 0 to 8 in every combination except all three zero, and keeps whatever falls inside the analysis window.
- f - mode frequency, in hertz.
- c - speed of sound, taken from the temperature set on screen.
- L, W, H - internal length, width and height of the room.
- p, q, r - whole numbers from 0 upward, one per axis. Two of them zero gives an axial mode, one zero a tangential mode, none an oblique mode.
Before you start
- Internal length, width and height - from the architect's construction issue drawings or a laser measurement on site, taken to finished surfaces rather than structural gridlines, since a few centimetres either way shifts every mode.
- RT60 - from a measurement report on a similar finished room, a consultant's simulation model at design stage, or a rule-of-thumb figure for the intended finish, since the room mode calculator does not derive it on its own.
- Air temperature - from the HVAC design set-point for occupied hours, since that is the condition the room will actually run in, or near 20 degrees Celsius if the set-point is not yet known.
- Working unit - decide metres or feet before typing into the room mode calculator, since switching later converts values already in the fields rather than clearing them, which can compound a typo.
- The one fixed dimension - usually the slab-to-slab height on a fit-out, needed before the ratio helper reshapes the rest of the plan around it, height decided first, footprint second.
- A published ratio to test against - Sepmeyer, Bolt or IEC 60268-13 among others, if you want the room mode calculator to check your proportions against a known-good shape rather than guesswork.
- A tape measure or drawing set - to read the three dimensions off site or off a plan before opening the room mode calculator, and a note of the intended use of the room.
- The programme material the room will host - music, dialogue or both, since that changes how much bass evenness actually matters in practice, more for music than for speech alone.
- Whether the room already exists or is still on the drawing board - an existing room lets you skip straight to the room mode calculator with real numbers, while one still on paper needs the drawings first.
Input fields for the room mode calculator
Every field the room mode calculator shows, grouped by panel, in the order the interface presents them. Each entry below names its default, its range and a sensible starting value drawn from the Load example preset.
Room dimensions
m / ft - Unit toggle for every dimension field in the room mode calculator. Metric is the default. Switching converts whatever is already typed, using the standard 0.3048 conversion factor, so pick a unit first before entering any numbers.
Length - The room's internal length, solved against first. Type a number or drag the slider, 1 to 20 m (3 to 65 ft), and Generate accepts up to 30 m (98 ft) once pressed. Example: 5.70 m.
Width - The room's internal width, the same field type and range as Length above it. A narrower width raises the frequency of every mode that depends on it directly. Example: 4.10 m.
Height - The room's internal height. The slider runs 1 to 20 m (3 to 65 ft), but Generate clamps it to 1 to 12 m (3 to 39 ft), a tighter ceiling than Length or Width. Example: 2.90 m.
Conditions
RT60 (s) - Reverberation time in seconds, typically 0.2 to 0.4 s for a small, largely untreated room. Range 0.05 to 5 s, default 0.21 s, example 0.28 s. A wrong guess shifts the Schroeder frequency in either direction.
Temperature (°C) - Air temperature, which sets the speed of sound used in every calculation the room mode calculator runs on this page. Range -20 to 50°C. Default 20°C, example 21°C.
Running the room mode calculator
Load example - Fills a well-proportioned control room: 5.70 by 4.10 by 2.90 m, 21°C, 0.28 s RT60, in one click, so you can follow this whole guide against real numbers.
Generate result - Calculates and reveals the spectrum, pressure map and summary numbers together. Stays disabled until Length, Width and Height all hold a value, then stamps the calculation with a time.
Reset - Clears Length, Width and Height entirely, and returns RT60 to 0.21 s and Temperature to 20°C, the room mode calculator's own built-in defaults, ready for the next room you check.
Fit a recommended ratio
Fit a recommended ratio - Dropdown of 11 published ratios: Sepmeyer, Louden, Bolt, Volkmann, IEC 60268-13, Golden ratio, Dolby. Applying one keeps your height and recalculates Length and Width. An empty Height defaults to 3 m (9.84 ft).
| Control | Unit | Accepted range | Example value |
|---|---|---|---|
| Length | m or ft | 1 to 30 m (3 to 98 ft) | 5.70 m |
| Width | m or ft | 1 to 30 m (3 to 98 ft) | 4.10 m |
| Height | m or ft | 1 to 12 m (3 to 39 ft) | 2.90 m |
| RT60 | s | 0.05 to 5 s | 0.28 s |
| Temperature | °C | -20 to 50 °C | 21 °C |
Accepted ranges are what Generate result holds once pressed, after rounding and clamping. The slider itself only reaches 20 m (65 ft), so anything above that needs the text field instead.
Reading your result
Every number and chart the room mode calculator returns once Generate result runs, in the order they appear on the page, from the spectrum down to the ratio verdict.
Modal spectrum - One bar per mode, arranged left to right by frequency. Bars stand tallest at Axial · 0 dB, then Tangential · −3 dB, then Oblique · −6 dB. Click any bar to load its pressure map.
Schroeder frequency - The decision number here for this room. Below it, each bar on the spectrum is an addressable problem. Above it, the response behaves as a statistical average, and broadband absorption becomes the practical fix.
Analysis ceiling - This page analyzes modes up to 300 Hz by default, the range most relevant to a small room. ALTA Integra can set that ceiling between 120 Hz and 400 Hz depending on where this embed is placed.
Pressure distribution - A 3D view of the selected mode, drag to orbit it. Bright zones mark pressure maxima, where a subwoofer excites that mode hardest, pale bands mark nulls. Move the subwoofer or listener out of the extremes.
Current ratio - Your proportions as 1 : W/H : L/H, with a verdict naming the Bonello criterion. A pass means mode density builds evenly band by band. A fail flags a thinner band, the likely source of uneven bass.
Surface area - Total internal wall, floor and ceiling area combined into one figure, the absorption area you are working with once treatment gets specified for the finished room, wall by wall.
Lowest mode - The frequency of the room's first, lowest resonance, the floor of its low end. Below this frequency the room cannot sustain a standing wave, and low-frequency output collapses no matter which loudspeaker is used.
Largest gap - The widest frequency gap between consecutive axial modes below the Schroeder frequency, the one range this room mode calculator flags as most likely to sound thin once the finished room is actually built.
Common mistakes
- Entering exterior or structural dimensions instead of internal, finished ones, which shifts every predicted mode frequency the room mode calculator returns, sometimes by several hertz at once, and throws off any treatment decision that follows.
- Typing all three dimensions into the room mode calculator but never pressing Generate result, so the Schroeder frequency and every summary stat stay a dash on screen, reading as empty rather than pending.
- Typing a height above 12 m (39 ft), or a length or width above 30 m (98 ft), which Generate silently rounds down without warning once pressed.
- Switching the m/ft toggle after entering values, which converts them by 0.3048 instead of clearing the fields, so a stray decimal typed before switching carries through the whole conversion.
- Opening Fit a recommended ratio before Height holds a real number, which silently locks the room to a 3 m default ceiling instead of your own measured one.
- Reading the pressure map's maroon and slate zones as opposites, when both mark maximum pressure and only alternate to keep neighbouring zones legible, so neither colour marks where sound disappears.
When the calculator is not enough
The result is only as good as the two figures you did not measure. RT60 and temperature both go into the room mode calculator as guesses unless recorded, and every frequency shifts with either one, sometimes by more than a few hertz, enough to move a peak into or out of the main seating position.
A room with a bay window, a sloped ceiling, an open doorway, or an irregular plan will not fit into three numbers at all. The room mode calculator has no field for any of it. Room mode behaviour itself is covered in depth by the Audio Engineering Society and the Acoustical Society of America.
Treat this as the proportioning pass, useful while a dimension can still move on the drawing and a room mode calculator run is nearly free. Once construction is close to fixed, or a client's budget depends on the low end being right, a measured response or a full simulation replaces the estimate. The Room Mode Calculator is the fast first pass, and for that next step, ALTA Integra takes it from there.
FAQ
What internal dimensions can I enter into the room mode calculator?
Length and width each accept 1 to 30 m (3 to 98 ft) and height accepts 1 to 12 m (3 to 39 ft), all clamped when you press Generate result. The on-screen slider only reaches 20 m (65 ft), so larger values need the text field.
Why do the Schroeder frequency and mode count still show a dash?
Those figures only appear after you press Generate result. Typing length, width and height reveals the spectrum chart and the pressure map straight away, but the Schroeder frequency, surface area, lowest mode and largest gap on the right stay a dash until the button actually runs the calculation and stamps a time on it.
What RT60 value should I enter if I have not measured the room?
The room mode calculator's own guidance suggests entering a figure in seconds, typically 0.2 to 0.4 s for a small, largely untreated room. Use a measured value instead if you have one, since RT60 feeds directly into the Schroeder frequency formula and a guess in the wrong direction shifts where the modal chart stops being the useful read.
Does switching between metres and feet clear my entered dimensions?
No. The m and ft buttons convert whatever is already typed using the standard 0.3048 factor. A length entered in feet becomes 0.3048 times that number in metres the moment you switch, so pick your working unit before typing to avoid compounding a rounding error across several fields.
Why did my length and width change when I chose a recommended ratio?
The Fit a recommended ratio dropdown holds your current height fixed and recalculates length and width to match the chosen proportion, for example Bolt or IEC 60268-13. Enter your real height first, because an empty height field makes the room mode calculator default to a 3 m (9.84 ft) ceiling before it reshapes the plan.
How do I read the pressure map to place a subwoofer?
Click the problem mode's bar in the modal spectrum chart, then drag the 3D pressure view to orbit it. Bright zones mark pressure maxima, where a subwoofer excites that mode hardest and absorption works best, and pale bands mark nulls, where a listening position barely receives the same frequency at all.