How to Use the Photometric Calculator
A field guide to operating the photometric calculator: what to prepare beforehand, every input in order, how to read the result, and the mistakes that quietly produce a wrong number on screen.
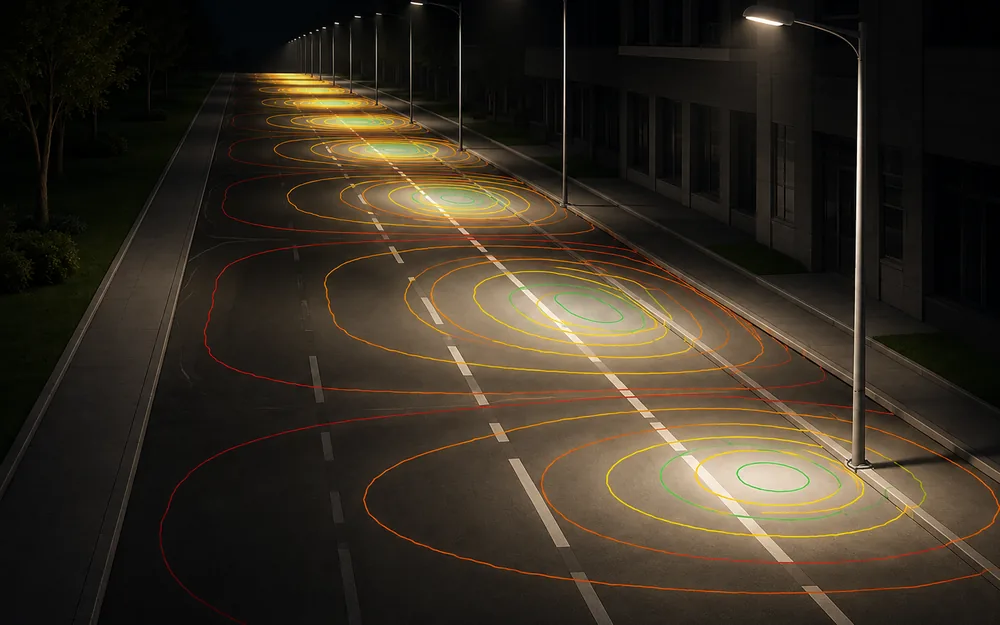
Table of Contents
The photometric calculator computes illuminance at a single marked point, produced by one named fixture at a set mounting height and offset.
Feed the photometric calculator a lamp's output, a candela distribution, a mounting height and a horizontal offset, and it returns the number that decides whether that point meets its target, in lux or footcandles.
The formula
The point calculation is the inverse square law with a cosine correction for the angle the light arrives at.
The last line is the same result written straight from mounting height, because d is h / cos θ.
- Φ - total luminous flux of the fixture, in lumens.
- θ - angle off vertical, atan(x / h).
- I(θ) - luminous intensity toward the point, in candela, read off the distribution curve.
- h - mounting height above the plane being measured.
- x - horizontal offset from directly below the fixture.
- d - the real fixture-to-point distance.
- E - illuminance at the point, in lux.
Before you start
Gather these before opening the photometric calculator, so the first pass through the interface uses real project numbers instead of placeholders.
- Total light output: rated lumens, or wattage plus efficacy, from the fixture's spec sheet.
- Candela distribution as candelas per 1000 lumens, from the fixture's IES file or printed photometric sheet, matched to the exact SKU.
- Mounting height above the work plane, from the reflected ceiling plan minus the work-plane height, often 0.75 m for a desk.
- Horizontal offset to the point being checked, read as a plan-view CAD dimension from the same drawing rather than a diagonal site measurement.
- Metric or imperial units, matching the project drawings, since manufacturer photometric data is almost always metric regardless.
- The exact lens or lamp variant being specified, since two options in one housing can carry different IES files.
- A lamp technology figure, LED, CFL, halogen or incandescent, if the datasheet gives watts rather than a lumen rating.
- The task illuminance target for the point being checked, from the project brief or the applicable lighting standard.
Input fields: driving the photometric calculator
The table below summarizes every field the photometric calculator's interface presents, grouped by panel. The detail underneath explains how to choose each value and where the tool's own default or limit sits.
| Control | Unit | Range or options |
|---|---|---|
| Metric / Imperial | Metric · lux, or Imperial · fc | |
| Enter lumens / From watts | two output entry modes | |
| Total luminous flux | lm | number, shown in Enter lumens mode |
| Power | W | number, shown in From watts mode |
| Efficacy | lm/W | number, or set automatically by Lamp technology |
| Lamp technology | Select a lamp technology…, LED, CFL, Halogen, Incandescent, Custom efficacy | |
| Mounting height | m or ft | number, step 0.1 |
| Horizontal offset | m or ft | number, step 0.1 |
| Angle | degrees | −85 to 85, step 1 |
| Preset | Narrow spot, Medium flood, Wide flood, Diffuse, Batwing, Custom (edited) | |
| Intensity table | cd / 1000 lm | 10 rows, 0 to 90 degrees in 10 degree steps |
Every field across the Lamp output and Geometry steps, with its unit and the range or options the interface offers.
Metric · lux / Imperial · fc - Sets the unit system the photometric calculator uses for every field and result. Switching converts entered height and offset values automatically, so re-entering figures is never necessary. This control sits in the tool's header, before either the Lamp output or Geometry panel.
To fill in - A checklist above the fields tracking three groups, Lamp output, Distribution and Geometry, each checked once it holds a usable value, a quick way to confirm nothing has been missed. It sits directly above the Lamp output panel, the first thing visible on the page.
Lamp output
This panel of the photometric calculator sets the lamp's total light output, entered directly or derived from power and efficacy. From watts is the more useful mode when a cutsheet quotes power and lm/W but never states a total lumen figure.
Enter lumens / From watts - Two ways to state the lamp's output. Enter lumens for a rated flux figure straight off a spec sheet. From watts derives flux from power and efficacy instead.
Load example - Loads a working case into the photometric calculator: From watts at 24 W and 110 lm/W, the Wide flood preset, 2.8 m mounting height, 1.2 m horizontal offset.
Total luminous flux - The lamp's rated output in lm. Shown only in Enter lumens mode. Type the manufacturer's stated figure directly, no conversion needed.
Power - The lamp's wattage in W. Shown only in From watts mode, combined with Efficacy to derive flux for the calculation.
Efficacy - Output per watt in lm/W. A datasheet's own stated efficacy is more accurate than the dropdown's generic range and should be typed in directly.
Select a lamp technology… - Fills Efficacy with a typical value: LED 80–150 lm/W, CFL 50–70 lm/W, Halogen 15–20 lm/W, Incandescent 10–15 lm/W, or Custom efficacy for a typed number. Picking a technology after typing a custom value overwrites it.
Geometry
Geometry tells the photometric calculator where the target point sits relative to the fixture, in either height-and-offset or height-and-angle form. Editing one pair updates the other automatically, so either form works from a site sketch or a CAD drawing.
Mounting height - Vertical distance from the fixture to the work plane, in m or ft. Number input, step 0.1.
Horizontal offset - Plan-view distance from the point directly below the fixture to the point being checked, in m or ft. Number input, step 0.1.
Angle · degrees - The same relationship expressed as an angle from straight down. Typing a value updates Horizontal offset to match, clamped between −85° and 85°.
Distance - Read-only, beside Angle, showing the straight-line distance to the target, recalculated live from height and offset without manual arithmetic.
Distribution
Distribution is where the photometric calculator gets its candela curve, either a built-in preset or values typed straight from a manufacturer's sheet. An accurate curve matters more here than an accurate lumen figure, since distribution shapes where the light actually lands.
Preset - Loads a representative candela curve into the Intensity table: Narrow spot · 12°, Medium flood · 28°, Wide flood · 46°, Diffuse · lambertian, Batwing · peak 50°, or Custom (edited) once a cell is typed over.
Intensity table - Ten rows, one per angle from 0° to 90° in 10° steps, each in candelas per 1000 lumens, typed straight from a manufacturer's photometric sheet.
Distribution - The polar chart above the table doubles as a control. Dragging inside it sets the target angle and changes Horizontal offset at the same time.
Generate result - Calculates once every group above carries a value. A first-time visitor is asked for a name and email before the figure appears, then results update live.
Reading your result
The photometric calculator's result panel reports the following figures once Generate result has been pressed, and every figure updates live after that first press without pressing the button again.
Illuminance on the floor - The decision number: illuminance at the marked point, on the horizontal work plane, in lux or fc. Compare it against the task requirement for that point.
Directly below (0°) - Illuminance at the nadir, straight under the fixture, normally the highest value on the floor for a downward-peaking distribution.
At the marked point - Repeats the headline figure so both sit together on screen for comparison.
Beam spread (50% peak) - The full angle where intensity has dropped to half its peak. Should match the loaded preset's own name, a quick sanity check on the entered curve.
Below the button row, six lines back the headline: Luminous flux, Beam angle, Polar value, Luminous intensity, Distance to the point, and Illuminance facing the beam, the perpendicular figure before the cosine correction, always higher than the headline once offset is non-zero.
These five report-row labels display in English even when the photometric calculator's interface is set to Indonesian, since they are hardcoded rather than translated in the tool.
Worked example - Load example values run through the photometric calculator: 24 W at 110 lm/W (2,640 lm), Wide flood preset, height 2.8 m, offset 1.2 m. Result: angle 23.2°, polar value 696 cd/klm, intensity 1,837 cd, distance 3.05 m, illuminance facing the beam 198 lux, illuminance on the floor 182 lux, directly below 482 lux, beam spread 46°.
Common mistakes
These are the errors that most often make the photometric calculator return a plausible but wrong number.
- Quoting Illuminance facing the beam instead of Illuminance on the floor: overstates the result by the cosine gap, worse at wider offsets.
- Dragging the polar chart just to read a value: silently moves Horizontal offset and the point being checked.
- Typing a diagonal site measurement into Horizontal offset: inflates it above the true plan-view distance from the fixture.
- Picking a lamp technology after typing a custom Efficacy: overwrites the typed number with a generic default for that technology.
- Typing raw candela figures into the Intensity table instead of the candelas-per-1000-lumens convention: inflates every downstream figure by the real flux multiple.
- Changing inputs before ever pressing Generate result: the result panel stays blank, reading as a fault rather than a step not yet taken.
When the calculator is not enough
The photometric calculator answers for one fixture and one point. A real layout with several fittings needs each run separately, results combined at the shared point, since a whole-room average is a different question answered by the Lumen Method calculator.
The distribution presets are generic shapes standing in for a real product. Once a fixture is chosen, the candela table belongs to that product's own manufacturer file, entered row by row before the figure is final. Interreflection off walls and ceiling plays no part in this calculation, and neither does daylight.
Illuminance definitions and the underlying photometric conventions behind the photometric calculator trace back to the CIE, the international body both IES-format files and most national lighting codes reference. A construction-ready lighting scheme needs full photometric software instead, with geometry, reflectance and glare modelled together. For that stage, or for a second opinion on a figure the photometric calculator has produced, ALTA Integra can take it from there.
FAQ
What is the difference between Illuminance on the floor and Illuminance facing the beam in the photometric calculator?
Illuminance on the floor is the horizontal result at the marked point, with the cosine correction for the target's tilt already applied. Illuminance facing the beam is the raw perpendicular figure before that correction, always the larger of the two once the point sits off to one side. Use the floor figure for design decisions.
Does the polar diagram in the photometric calculator change my inputs, or only display them?
Both. Dragging inside the polar chart sets the target angle and updates the Horizontal offset field behind the scenes, so a drag meant only to inspect the curve can move the point being checked. Read the curve with a light touch, or check the Horizontal offset value afterward.
What does the Beam spread figure mean in the photometric calculator?
Beam spread reports the full angle at which the loaded intensity distribution has fallen to half its peak value, the same convention manufacturers use for a quoted beam angle. Comparing it against a preset's own name, such as the Wide flood curve's 46 degrees, is a quick check that the curve loaded correctly.
Why does nothing happen when I change the height or offset in the photometric calculator?
Every field in the result panel stays blank, showing a dash placeholder, until Generate result is pressed once. After that first press, changing height, offset or the intensity table recalculates every figure live, without needing to press the button a second time.
Can the photometric calculator handle more than one fixture at once?
No, the photometric calculator computes the direct contribution from a single named fixture at a single point. For several fittings, run each one separately for the same point and add the resulting illuminance values together, since light from multiple sources sums at a shared point.
Should I use the photometric calculator or the Lumen Method calculator for a lighting layout?
Use the photometric calculator to check what one fixture delivers to one specific point. Use the Lumen Method calculator for a whole-room average, such as roughly how many fittings a space needs. The two answer different questions and can disagree without either being wrong.